Pages

Sunday, November 24, 2013

Cream Cheese-Filled Pumpkin Snickerdoodles


Who doesn't like snickerdoodles? It is a simple cookie that makes everyone smile...in between stuffing their faces because, well, let's be honest- there's no way to have just one.
Sometimes it can be dangerous to take such a traditional recipe and change it up because it is hard for even the most delicious cookie to compete with another cookie with so much personal history and nostalgia attached to it. Luckily, one bite of these and this recipe had no one even thinking about asking for regular snickerdoodles. It was able to tactfully add some fall flair to the classic cookie with the addition of pumpkin and also a cream cheese filling.

Truthfully, I could have put more of the cream cheese filling in them (I did end up with some left over), but it was my first time making them so in the beginning I went a little light on the filling, not wanting to run out. So if you give these a try, keep in mind, it's okay to be generous with the filling; just make sure it is fully covered by cookie before baking!

cream cheese-filled pumpkin snickerdoodles
Makes about 2 dozen cookies
{recipe from Bakeaholic Mama}

for the cookie:

Ingredients

  • 3 3/4 cups all-purpose flour
  • 1 1/2 teaspoons baking powder
  • 1/2 teaspoon salt
  • 1/2 teaspoon ground cinnamon
  • 1/4 teaspoon ground nutmeg
  • 1 cup (2 sticks) unsalted butter, room temperature
  • 1 cup granulated sugar
  • 1/2 cup light brown sugar
  • 3/4 cup pumpkin puree
  • 1 egg
  • 2 teaspoons vanilla extract

for the filling:

Ingredients
  • 1 (8 ounce) package cream cheese, softened
  • 1/4 cup granulated sugar
  • 2 teaspoons vanilla extract
for the cinnamon-sugar coating:

Ingredients
  • 1/2 cup granulated sugar
  • 1 teaspoon ground cinnamon
  • 1/2 teaspoon ground ginger
  • dash of allspice

Directions

  1. For the cookies- in a medium bowl, whisk together flour, baking powder, salt, cinnamon and nutmeg. Set aside. 
  2. In bowl of electric mixer fitted with paddle attachment, beat together butter and sugars on medium-high speed until light and fluffy, about 2-3 minutes. Blend in pumpkin puree. Beat in egg and vanilla until incorporated. With mixer on low speed, slowly add dry ingredients and mix until just incorporated. Cover and chill dough for at least 1 hour.
  3. While the dough chills, make the filling. In a small bowl, mix together the cream cheese, sugar and vanilla until smooth and creamy. Cover and chill for at least half an hour.
  4. Preheat oven to 350°F. Line baking sheets with parchment paper. In a small bowl ,mix together the sugar and spices for the coating thoroughly. Take one tablespoon of dough and flatten it into a pancake shape. Place about 1 teaspoon of cream cheese mixture in the middle of the pancake. Form another tablespoon of dough into an equally sized pancake shape and place on top, keeping the cream cheese in the middle. Gently pinch together the edges of the dough around the cream cheese to seal, then gently roll into a ball. Roll balls in cinnamon-sugar mixture to coat. Repeat with remaining dough, spaces the balls 2-3 inches apart on the baking sheets. Dip the bottom of a flat heavy-bottomed drinking glass in water to moisten slightly. Then dip it in the cinnamon-sugar mixture, and use the bottom to flatten the dough balls slightly. Recoat bottom of glass in cinnamon-sugar mixture as needed.
  5. Bake cookies for 10-15 minutes, or until they are slightly firm to the touch and tops are beginning to crackle. Let cool on baking sheets about 5 minutes, then transfer to wire rack to cool completely. 

Saturday, November 16, 2013

Apple Cobbler Cupcakes with Pumpkin Pie Frosting

Have you ever wondered what fall would taste like in a cupcake? Well, my first bite of this cupcake answered that question for me.
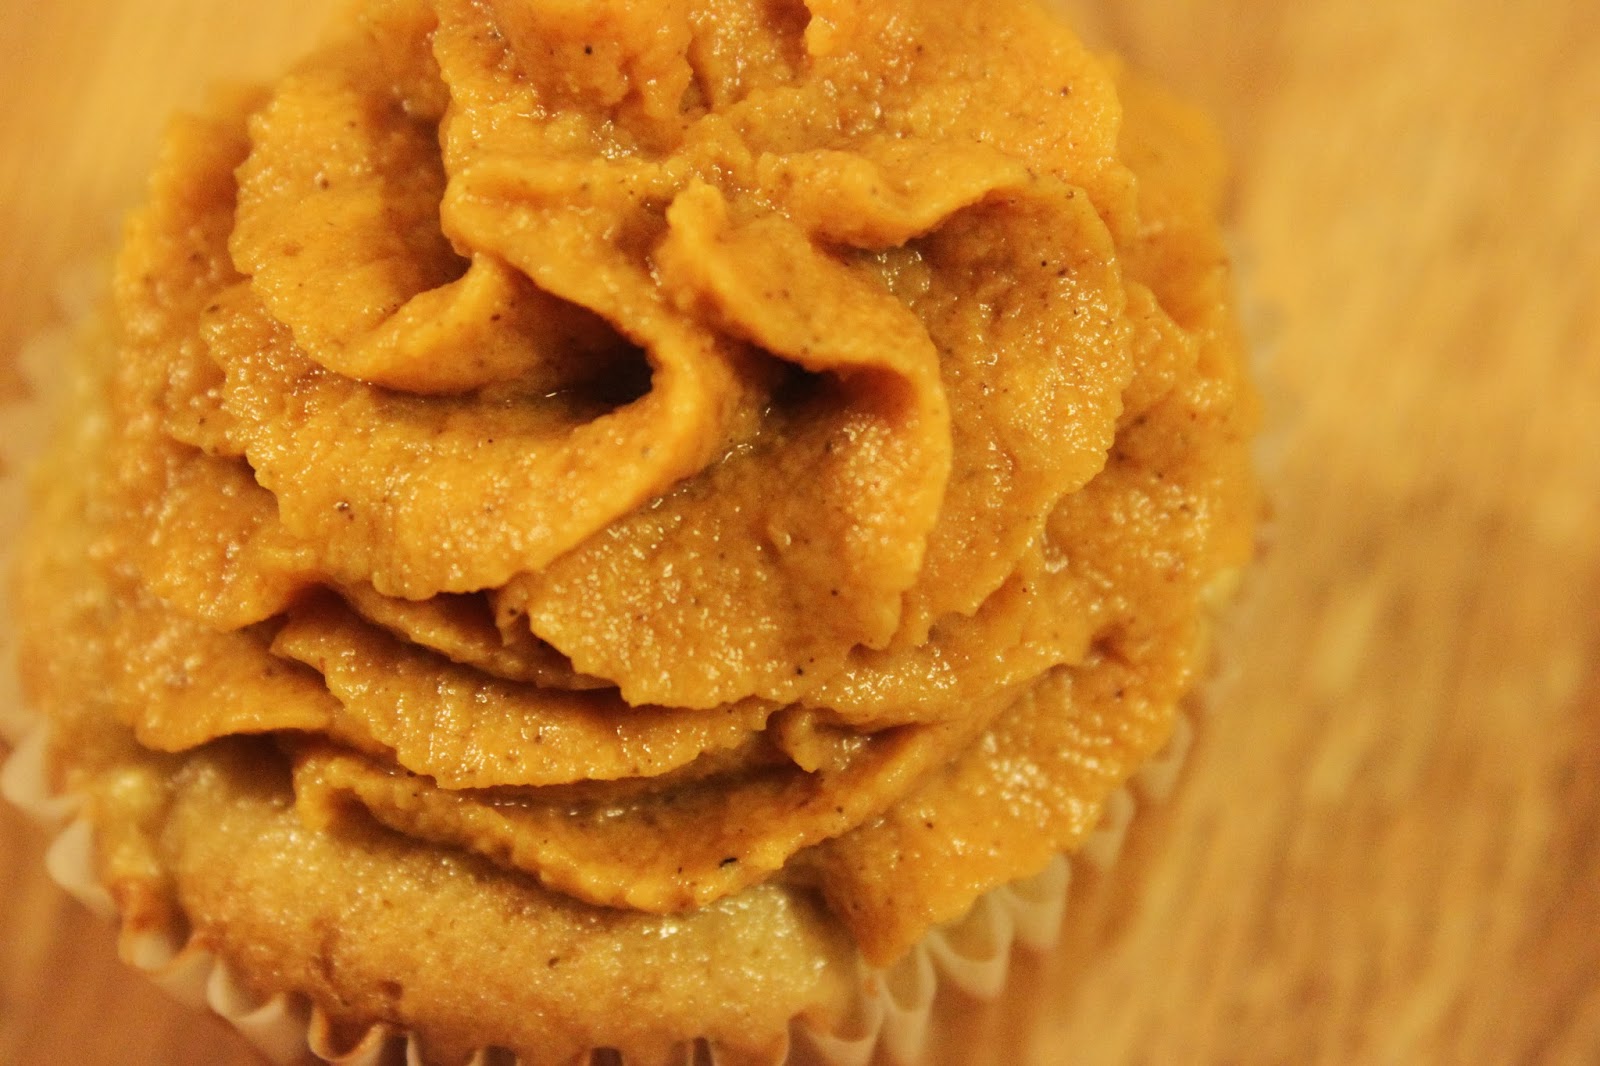
It consists of a moist apple cake and pumpkin pie frosting- and when I say pumpkin pie frosting, I mean literally pumpkin pie, as frosting. You take a pumpkin pie, lightly beat/mix it to make it smooth and even throughout, place it in a piping bag and pipe it. I mean really- there is just no better way to add pumpkin pie flavor to a cupcake. You can either make the pumpkin pie or buy a premade pie. I made mine without crust to make it easier to pipe- I just cut a piece out, blended it together a bit and then put it in a piping bag. If there is a crust on your pie, you should scoop the filling out or try blending the crust in with the filling.
mmm pumpkin pie
This cupcake is delicious even for those who don't love pumpkin pie because the apple cupcake nicely balances the pumpkin flavor, making it not so overwhelmingly pumpkin.

apple cobbler cupcakes with pumpkin pie frosting
Makes 12 cupcakes
{recipe slightly adapted from The Cupcake Project}

for the cupcake:

Ingredients
  • 1 1/2 cups all-purpose flour
  • 1 1/4 teaspoons baking powder
  • 1/4 teaspoon baking soda
  • 1/2 teaspoon ginger
  • 1/2 cup unsalted butter, room temperature
  • 3/4 cup brown sugar
  • 1/4 cup sugar
  • 2 eggs
  • 1/2 cup sour cream
  • 1/2 teaspoon lemon zest
  • 2 1/2 cups apples, roughly chopped and loosely packed
Directions
  1. In a medium bowl, whisk flour, baking powder, baking soda and ginger together. Set aside.
  2. Beat butter and sugars in a large bowl until light and fluffy.
  3. Beat in eggs, sour cream and lemon zest until blended.
  4. Gradually mix in flour mixture until just incorporated. Batter will be thick.
  5. Divide batter evenly among 12 cupcake liners (they will be filled almost all the way to the top).
  6. Bake at 350°F for about 25 minutes or until a toothpick comes out clean from the center of the cupcake. Let cool in pan for 1-2 minutes, then remove to cool completely on wire rack.
for the frosting:

Ingredients
  • 3/4 cup sugar
  • 1/2 teaspoon salt
  • 1 1/2 teaspoon pumpkin pie spice
  • 2 eggs
  • 1 (15 ounce) can pumpkin (pure pumpkin, not pumpkin pie filling)
  • 1 (12 ounce) can evaporated milk
Directions
  1. Preheat oven to 425°F.
  2. In a large bowl, beat eggs. Stir in sugar, salt and pumpkin pie spice. Mix in pumpkin then evaporated milk.
  3. Pour into 9" pie plate (no crust needed). Bake for 15 minutes. Reduce heat to 350°F and bake for another 40-50 minutes, until a toothpick comes out dry.
  4. Remove from oven and leave on counter 2 hours before use. 
  5. Once cool, cut out desired portion of pie and place in medium sized mixing bowl. Mix by hand or with electric mixer until moisture is distributed evenly and pie looks smooth throughout, about 30 seconds. Pipe onto cupcakes as desired.

Saturday, November 9, 2013

Apple Pie Cupcakes

Full swing into fall here! These cupcakes are the perfect fall treat! For those who aren't a fan of pie crust, these apple pie cupcakes are a great alternative! They truly are one of my favorite cupcakes now! The cake portion contains fresh grated apple which blends perfectly with the apple pie filling. To top them off there is a cinnamon brown sugar swiss meringue buttercream (that's a mouthful). Oh, and I did sprinkle some cinnamon sugar on top, but just a smidge.
I ended up altering the recipe, mainly because I didn't have sour cream. (I've been really bad at this planning thing lately!) Also, the apples I used were Empire, because that was what I had from apple picking and they did not disappoint!
On a side note, I really have fallen in love with my food processor. It has the capability to shred/grate (versus just demolishing things into crumbs) and after making carrot cake cupcakes and these apple pie cupcakes it has really given me a new appreciation for it!
These cupcakes would really be the perfect addition to any fall festivity!

apple pie cupcakes
Makes 24 cupcakes
{recipe adapted from The Cake Blog}

for the cupcakes:

Ingredients

  • 3 cups all-purpose flour
  • 1 cup granulated sugar
  • 1/2 cup light brown sugar
  • 2 teaspoons baking powder
  • 1/2 teaspoon baking soda
  • 1 teaspoon salt
  • 2 teaspoons ground cinnamon
  • 3 eggs
  • 1 cup vegetable oil
  • 1/4 cup plus 2 tablespoons buttermilk
  • 2 1/2 tablespoons unsalted butter
  • 2 teaspoons vanilla extract
  • 2 cups grated apples

Directions

  1. Preheat oven to 350°F and line cupcake pan with liners.
  2. In a medium bowl combine dry ingredients: flour, both sugars, baking powder, baking soda, salt and cinnamon.
  3. Using a mixer fitted with whisk attachment, whisk together eggs, vegetable oil, buttermilk, butter, and vanilla.
  4. Gradullay whisk in dry ingredients to wet ingredients until smooth.
  5. Fold in grated apples.
  6. Fill cupcake liners 2/3 full with batter. Bake for 18-20 minutes or until toothpick inserted into center comes out clean. Let cupcakes cool in pan for 5 minutes, then finish cooling on wire racks.

for the apple pie filling:

Ingredients

  • 3 apples, finely chopped
  • 1 tablespoon unsalted butter
  • 2 tablespoons light brown sugar
  • 1 teaspoon lemon juice
  • 1/4 teaspoon cinnamon

Directions

  1. Place chopped apples, butter, brown sugar, lemon juice and cinnamon in a medium-sized pan. Cook over medium heat for 8-10 minutes, until apples are tender. Stir occasionally.
  2. Allow mixture to cool.
  3. Use cone method to remove center from cupcakes and fill with cooled filling, then place cupcake top back on.


for the frosting:

Ingredients

  • 2 sticks salted butter, room temperature and cubed
  • 3 egg whites
  • 3/4 cup light brown sugar
  • 1 teaspoon vanilla extract
  • cinnamon, to taste

Directions

  1. In bowl of stand mixer, combine egg whites and brown sugar. Place over pan of simmering water and whisk continuously until sugar is dissolve and temperature on a candy thermometer reaches 150F, about 2 minutes.
  2. Attach bowl to mixer stand fitted with whisk attachment. Starting on low speed and gradually increasing to medium-high speed, whisk until mixture doubles in size and is glossy and fluffy, about 10 minutes.
  3. Change mixer to paddle attachment and add butter, one cube at a time, mixing well after each addition. Add vanilla and cinnamon to taste and mix until combined. Decorate cupcakes as desired.

Thursday, October 31, 2013

Red Velvet Heart Cupcakes

Happy Halloween!

Being in the medical field, it only seemed appropriate to make disgusting (looking) cupcakes for Halloween. I came across these realistic heart cupcakes by Lily Vanilli and just HAD to try them.

Needless to say, even some of the strong-stomached individuals I work with had to pass just on looks. Most of them were brave enough (or intrigued enough) to try them though! They are basically a red velvet cupcake covered in cream cheese frosting then in fondant. The "blood" is made out of strawberry syrup mixed with red gel food coloring.

The cream cheese frosting I used is the recipe from the Carrot Cake Cupcakes I made...I liked it better than what I had used for the Blue Velvet Cupcakes because it seemed less sweet.

I can honestly say, these are the creepiest cupcakes I've ever made, but I loved every second of it, and they were perfect for Halloween! 


If they don't creep you out too much you should definitely try them! They look more complicated to make than they actually are!

Click here for my marshmallow fondant recipe.

red velvet heart cupcakes
Makes 24 cupcakes

for the cupcake:

Ingredients
  • 1/2 cup vegetable shortening
  • 1 1/2 cups sugar
  • 2 eggs
  • 1 teaspoon vanilla extract
  • 2 1/4 cups all-purpose flour
  • 1 teaspoon salt
  • 1/4 cup cocoa powder
  • 1/2 teaspoon red gel food coloring (or 1 ounce liquid food coloring)
  • 1 cup buttermilk
  • 1 teaspoon white vinegar
  • 1 teaspoon baking soda
Directions
  1. Preheat oven to 350 degrees F. Line cupcake pan with liners.
  2. In bowl of electric mixer cream shortening and sugar until fluffy. Add eggs, 1 at a time, beating after each addition. Add vanilla.
  3. In a separate bowl whisk together the flour, cocoa and salt.
  4. Add 1/3 of flour mixture to shortening mixture and beat on low. Add half of the buttermilk. Alternate adding flour mixture and buttermilk, ending with flour mixture. Add food coloring. 
  5. In a small bowl, combine vinegar and baking soda. Add to cake batter, mixing until just combined. 
  6. Pour batter into prepared liners about 3/4 full. Bake for 12 - 15  minutes or until toothpick comes out clean. Cool in pan for 10 minutes before moving to wire racks to cool completely.
for the frosting:
{recipe slightly adapted from King Arthur Flour}

Ingredients
  • 1/2 cup salted butter, at room temperature
  • 1 (8 ounce) package cream cheese, at room temperature
  • 2 teaspoons vanilla extract
  • 2 1/2 to 3 1/2 cups confectioners' sugar
  • milk or cream to adjust consistency of frosting, if necessary
Directions
  1. Beat butter and cream cheese together until smooth.
  2. Beat in vanilla, then sugar. Add a teaspoon of milk or cream if frosting is too stiff to spread. Add additional sugar if it's too thin.
assembly

Ingredients
  • fondant
  • strawberry syrup (or other red syrup)
  • red gel food coloring
Directions
  1. Remove liners from cupcakes and set aside. Roll out an oval-shaped piece of red fondant about 1/4" in thickness. Make sure the oval will be large enough to fit around your cupcake with room to spare.
  2. Lightly frost the top and bottom of a cupcake, making it as smooth as possible (it may be easier if cupcakes are frozen first). Place a dab of frosting in the center of your oval and then place cupcake on its side on the dab of frosting. Place frosting on bare spots of cupcake (its okay if it isn't completely covered). 
  3. Bring up the sides of the fondant, having them meet at the top of your sideways cupcake. Use the extra fondant on top to carefully make three arteries. Don't worry about any wrinkling or folds in the fondant- they will make them look more gory once the "blood" is added. Repeat process with other cupcakes.
  4. Combine strawberry syrup and red food coloring until desired deep red color is created. Use a pastry brush to paint syrup mixture onto hearts and then spoon some into the artery holes and around the base of the heart.

Saturday, October 26, 2013

Pumpkin Ginger Cupcakes with Toasted Marshmallow Frosting

I. Love. These. Cupcakes. 
Period. 
That's really all I have to say about them.


I found this recipe written down in my recipe book from last fall, and knew that it must have been good (or why else would I have kept it?), but I didn't expect such a delicious and perfect fall cupcake. How had I ever forgotten it? It has the perfect flavor combination, and this year I decided to add toasted marshmallow frosting on top (not really sure, what I used last year), and it's fluffy and airy texture compliments the moist cupcake perfectly.


The decorations on top are made from marshmallow fondant (recipe here), and the toasting of the marshmallow frosting was a last minute decision. The last time I made marshmallow frosting I was discouraged because I really wanted to toast it, but I didn't have a torch and using a regular lighter was not cutting it. I still don't have a torch, but this time decided to put the freshly frosted cupcakes on a baking sheet and under the broiler for a minute or so (obviously watching them very carefully!). Now, you don't have as much control with the toasting this way, but they turned out pretty good, and if eaten right away you have that nice crunch to the outside of the frosting. Once toasted, the fondant hats and pumpkins didn't really stick to the top of the cupcakes on their own, so I had to dab some more frosting underneath them; after that they were fine!


To make the witch's hat out of fondant, I cut a circle out of the rolled fondant using a small measuring cup (if I had a small enough circle cookie cutter I would have used that). Then I made a teardrop shape out of the purple fondant and flattened the bottom. I bent the tip of the teardrop a couple times to get the desired effect I wanted, then attached it with a dab of water to the circle already cut out. Then I cut long strips out of green rolled fondant and attached those to the base of the hat. Finally I cut small pieces of rolled orange fondant to piece together to make the buckle on the hat.


The pumpkins were less labor-intensive. I simply rolled a small amount of orange fondant into a ball and then scored it using a toothpick. You don't need to drag the tip of the toothpick through the fondant, you can simply press the toothpick (lengthwise) into the fondant to make a groove. Then I took some of the leftover green fondant from the hats and made little stems to attach on top.


I hope you try these delicious cupcakes and have a happy Halloween!!


pumpkin ginger cupcakes with toasted marshmallow frosting
{Makes 24 cupcakes}

for the cupcakes:
{recipe from allrecipes.com}

Ingredients
  • 2 cups flour
  • 1 (3.4 ounce) package instant butterscotch pudding mix
  • 2 teaspoons baking soda
  • 1/4 teaspoon salt
  • 1 tablespoon ground cinnamon
  • 1/2 teaspoon ground ginger
  • 1/2 teaspoon ground allspice
  • 1/4 teaspoon ground cloves
  • 1/3 cup crystallized ginger, finely chopped 
  • 1 cup butter, room temperature
  • 1 cup granulated sugar
  • 1 cup packed brown sugar
  • 4 eggs, room temperature
  • 1 teaspoon vanilla extract
  • 1 (15 ounce) can pumpkin puree 
Directions
  1. Preheat oven to 350°F and line cupcake pan. Whisk flour, pudding mix, baking soda, salt, cinnamon, ground ginger, allspice, cloves and crystallized ginger in a medium bowl.
  2. Beat butter, granulated sugar and brown sugar with an electric mixer in a large bowl until light and fluffy. Add 3 of the eggs, one at a time, beating between each one. Beat in vanilla and pumpkin puree with the last egg. Stir in flour mixture until just incorporated. Pour batter into liners.
  3. Bake in preheated oven until golden and tops spring back, about 20 minutes. Cool in pans for 10 minutes before moving to wire rack to cool completely.
for the marshmallow frosting:
{recipe from Martha Stewart}

Ingredients
  • 8 egg whites
  • 2 cups sugar
  • 1/2 teaspoon cream of tartar
  • 2 teaspoons vanilla extract
Directions
  1. Place egg whites,  sugar and cream of tartar in heatproof bowl of electric mixer. Set over a saucepan of simmering water. Whisk constantly until sugar is dissolved and whites are warm to the touch, 3 to 4 minutes (if you rub the mixture between your fingers you should not feel any graininess).
  2. Transfer bowl to electric mixer fitted with whisk attachment, and beat, starting on low speed and gradually increasing to high, until stiff, glossy peaks form, about 5 to 7 minutes. Add vanilla and mix until combined. Use immediately to frost cupcakes as desired. Once cupcakes are frosted place on baking sheet and put under broiler on high for approximately 1 minute, until frosting is toasted (BE SURE TO WATCH CAREFULLY), or use a torch to toast frosting.

Sunday, October 20, 2013

Carrot Cake Cupcakes

As some of you may know (and most do not), I am a veterinary technician. I have been a vet tech for the past 4 years, and although it can be very stressful (as a recent 13 hour shift reminded me), it can also be very rewarding! The way I explain what a vet tech is to people is to say that it is basically a nurse for animals, but in reality it is so much more. Yes, like nurses we take care of the patients needs, take vital signs, etc, but we also do things that in human medicine there are other specialized fields for, such as taking x-rays, cleaning teeth, drawing blood and monitoring during anesthesia. And this past week was National Veterinary Technician Week, in order to honor all of those hard working vet techs out there! To do my share, I made some yummy fall-flavored carrot cake cupcakes decorated as dogs and cats (although where I work we see more than that!) to share with my coworkers!


To be completely honest, I did not plan my decorating very well in advance and ran out of frosting 3/4 of the way through (hence the plainly frosted ones you can see below), but I made the best of what I had!


The cake turned out extremely moist and delicious, as expected with carrot cake, and the cream cheese frosting was a perfect compliment!

If you're wondering what I used to decorate each animal, I can explain. For the cats, I used mini M&M's for the eyes and tongue, and then a sugar heart candy (kind of like Runts) for the nose. I cut marshmallows into triangles for the ears. Next time I would melt some chocolate and pipe it into triangles on waxed paper and use that for the ears. My brain was just not working properly that night.


For the dogs, I used chocolate covered raisins for the noses and mini M&M's for the eyes.


I did make mini cupcakes so if making regular-sized cupcakes you may need to use normal M&M's vs mini M&M's for decorating purposes.

I hope you find this recipe as delicious as I did and Happy Vet Tech Week to all the vet techs out there!

carrot cake cupcakes
Makes 24 cupcakes
{recipe slightly adapted from King Arthur Flour}

for the cupcake:

Ingredients

  • 1 1/2 cups vegetable oil
  • 2 cups granulated sugar
  • 1 teaspoon salt
  • 4 eggs
  • 1 tablespoon ground cinnamon
  • 1/2 teaspoon ground ginger
  • 1/4 teaspoon ground allspice
  • 2 cups all-purpose flour
  • 2 teaspoons baking soda
  • 3 cups finely grated carrots
  • 1 1/2 cups chopped pecans or walnuts
Directions
  1. Preheat oven to 350°F. Lightly grease two standard muffin pans or cupcake pans; or line with paper liners and grease the papers (I used foil liners and did not need to grease them).
  2. Beat the oil, sugar, salt, eggs and spices together.
  3. In a small bowl, mix the flour with the baking soda, then stir into egg mixture.
  4. Add the carrots and nuts, and mix until just blended. Pour into prepared pans.
  5. Bake cupcakes for 30 to 35 minutes, or until toothpick inserted into the center comes out clean. Remove from oven, and after about 10 minutes transfer them to wire rack to cool completely.

for the frosting:

Ingredients
  • 1/2 cup salted butter, at room temperature
  • 1 (8 ounce) package cream cheese, at room temperature
  • 2 teaspoons vanilla extract
  • 2 1/2 to 3 1/2 cups confectioners' sugar
  • milk or cream to adjust consistency of frosting, if necessary
Directions
  1. Beat butter and cream cheese together until smooth.
  2. Beat in vanilla, then sugar. Add a teaspoon of milk or cream if frosting is too stiff to spread. Add additional sugar if it's too thin. Frost cupcakes, as desired.


Saturday, October 12, 2013

Nutella Mousse Brownie Trifle

No this is not necessarily a fall recipe, but it is incredibly delicious! I don't own a trifle bowl, as I had never made one before this, so I ended up putting it in a regular glass bowl. It wasn't as pretty as it could have been, but I had no complaints from those devouring it!

Kind of lost the sense of layers because of the glass bowl vs a trifle bowl, so just use your imagination!
I don't know why I didn't think of putting in multiple little glasses at the time (although, I wouldn't have had enough of those either), especially considering how I love everything bite- size! Next time around I'll add some whipped cream to the top and sprinkle some more toasted hazelnuts on top to finish it off...or maybe add strawberries....or both! I really was just trying to use up some extra ingredients I had lying around the house, and I was not disappointed with the results!

nutella mousse brownie trifle

for the mousse:
{recipe from Mele Cotte}

Ingredients

  • 2 1/2 cups heavy cream
  • 1 1/2 cups powdered sugar, sifted
  • 16 ounces cream cheeese, at room temperature
  • 13 ounces Nutella
  • 1/2 cup hazelnuts, finely chopped


Directions


  1. In stand mixer with whisk attachment or with a hand mixer in a large bowl, whip the cream until it holds medium peaks. Beat in 1/2 cup of powdered sugar and whip until cream holds stiff peaks. Carefully transfer the cream into bowl and refrigerate until needed.
  2. In stand mixer with paddle attachment, beat cream cheese until smooth. Add remaining one cup of powdered sugar, starting on low speed and gradually increase to medium speed until incorporated and smooth. Add Nutella and hazelnuts.
  3. Using a large rubber spatula, gently stir in about one quarter of whipped cream to lighten the hazelnut mixture. Then, carefully fold in remaining whipped cream. Transfer into bowl and cover completely witth plastic wrap or a cover. Refrigerate at least 4 hours or overnight.
for the brownies:
{recipe slightly adapted from Taste of Home}

Ingredients
  • 2/3 cup unsalted butter, cubed
  • 3/4 cup baking cocoa
  • 1/4 cup vegetable oil
  • 2 cups sugar
  • 4 eggs
  • 2 teaspoons vanilla extract
  • 1 1/2 cups all-purpose flour
  • 1 teaspoon baking powder
  • 1 teaspoon salt
  • 2/3 cup semisweet chocolate chips
  • 1/2 cup milk chocolate chips
  • 1 cup coarsely chopped toasted hazelnuts
Directions
  1. Melt butter in large saucepan. Whisk cocoa in oil until smooth. Cook and stir over low heat until cocoa is blended. Transfer to large bowl; stir in sugar. Add eggs, one at a time, stirring well after each addition. Stir in vanilla. Combine flour, baking powder and salt; gradually add to cocoa mixture. Stir in chocolate chips and nuts.
  2. Spread into greased 13" x 9" baking pan. Bake at 350 degrees F for 25-30 minutes or until toothpick inserted near center comes out clean. Cool in pan on wire rack.

Assembly

Cut up brownies into small pieces and put a layer of the chunks on bottom of trifle bowl. Layer mousse on top. Then place another layer of brownie over mousse. Repeat process until all mousse and brownie is used up, preferably ending with brownie layer on top.