
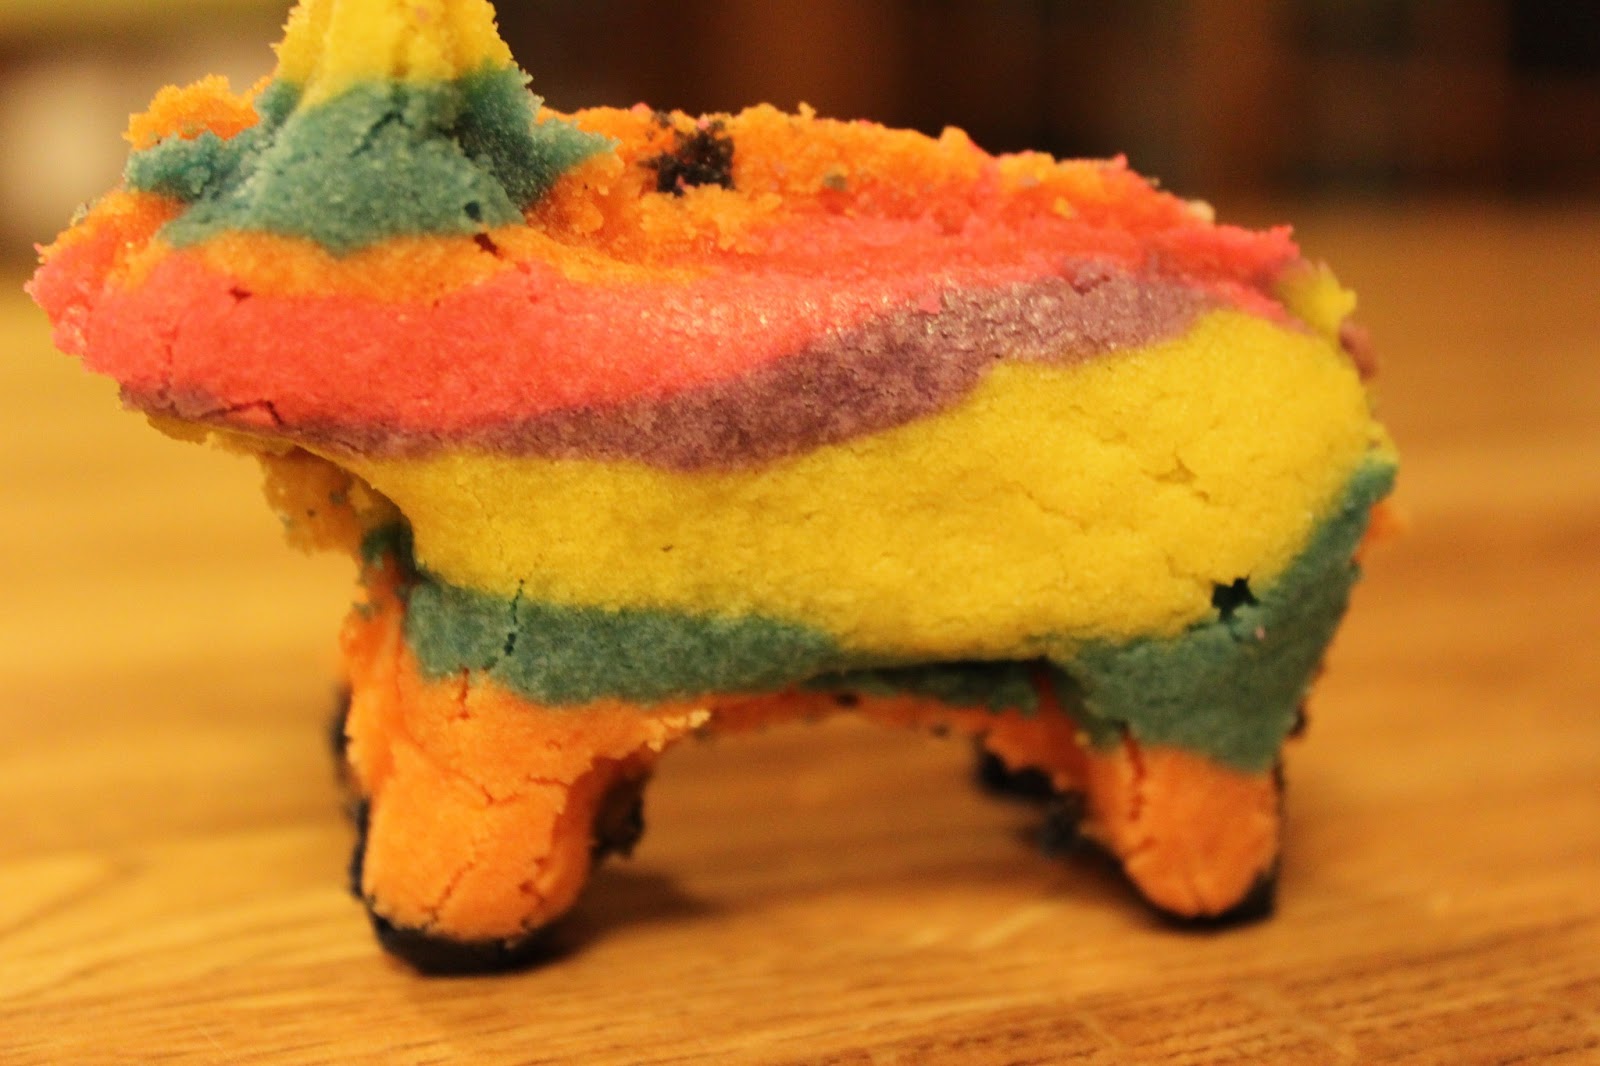
Aren't these so cute? I must admit, these were a little bit of a learning experience and if I were to make them again, they would look much better (see the glue job I did on the leg in the photo below?). But all in all, they came out well and they were yummy!

These cookies involved quite the process, so I may as well start now. First you make the dough, which was very simple. Separate the dough into 5 large balls and 1 smaller ball. Simple enough right? Apparently not… I could not count and did 4 large balls and 1 small ball at first. Luckily, I realized in time (not that it would really have been a big deal- you can do as many, or as little, colors as you want), and was able to create a small ball from the other colors and make it black.

I found it super easy, and much less messy to mix the food coloring in with my mixer. Within a minute I had an evenly colored ball of dough and very minimal food coloring on my hands! Hooray!
After the dough balls were colored, I layered the colors in a Pyrex loaf pan lined with plastic wrap and then popped it in the freezer. When it came time to removing the frozen dough from the pan, it was a little difficult though. I had to make my husband wedge it out with a knife (I was too chicken- I thought I would definitely ruin it). If I had used a plastic container instead, it may have come out easier, since the plastic has more give to it. The other thing you want to be sure of is that your container is at least the width and height of your cookie cutter.

Once the dough was out of the container, it was easy to slice it into ¼” slices, but with the warmer weather, those individual slices unfroze quickly which made them harder to transfer to the pan. I found that sliding a knife under the pieces for support worked very well when moving them to the baking sheet.

IMMEDIATELY after they are baked you have to cut them with the cookie cutter (they crumble the more that they start to cool). The thing is, I don’t own a donkey cookie cutter, so I decided to make my own out of a plastic bottle and wire.
 |
| Tada! |
Another tip- it's easiest to work in batches of 3 cookies when cutting the cookies- cut 2 with the cutter in one direction and then 1 with the cutter flipped over to get a donkey facing the other direction. Then cut the legs and ear off of 1 of the 2 donkeys facing the same direction, and also cut the center out of the same cookie using a square or oval cookie cutter (I just used a knife). I would have a picture here of what your 3 pieces should look like for each cookie, but I messed up this part and accidentally cut into the 1 facing the opposite direction (for ALL of my cookies...oops)so one side of my finished cookies wasn't as pretty. No one seemed to complain though!
After they are cool, you can start layering the cookies. Place one cookie with the baked bottom side up and pipe on the frosting glue (you don't need to put any on the legs or head). Then put the middle cookie on, fill the hole with some mini M&M's and pipe some more frosting glue around it. Finally, you can put the last cookie on (baked bottom side in). Let them sit for 30 minutes before standing them upright so that the frosting can dry.

 |
| Sorry, the photos are dark...I was doing some late night baking! |
Happy Cinco de Mayo!

Piñata Sugar Cookies
{recipe from sheknows}
Makes 6 - 8 piñata cookies
Ingredients
- 1 cup granulated sugar
- 1 cup powdered sugar
- 1 cup butter
- 1 cup vegetable oil
- 2 eggs
- 1 teaspoon cream of tartar
- 1 teaspoon salt
- 1 teaspoon baking soda
- 5 cups flour
- 1 teaspoon almond extract
- 1 tablespoon vanilla
- Mini M&M's
- 1/2 cup powdered sugar (for the frosting)
- 2 teaspoons milk (for the frosting)
Directions
- Cream the sugars with the butter until light and fluffy. Beat in the eggs. Then add the oil. Combine dry ingredients together in a large bowl and then gradually add them to the liquid mixture. Mix in vanilla and almond extract.
- Split the dough into 5 even-sized balls and 1 smaller ball (to be the black one). Add food coloring until the desired color is achieved.
- Line a container that is about the same width/height as your donkey cookie cutter (I used a loaf pan, but a plastic container may work better) with plastic wrap. Start with the black dough on the bottom. If you want to alternate the colors twice (as I did) split the colored dough balls in two, layer them in any order, and then repeat in the same order. I found the easiest way to do this was to crumble the dough over the entire area where you were putting it and then flattening it down. Cover the dough and freeze for 4 hours or overnight.
- Remove the dough from the container and unwrap the plastic wrap. Cut 1/4" slices and place them on parchment lined baking sheets. Bake them at 350 degrees F for 12 minutes. They may seem a little soft when you take them out, but they need to be in order to be cut.
- Immediately after the cookies are taken out of the oven (work fast! the cookies crumble once they are too cool) use your cookie cutter to cut the donkey shapes. Working in sets of 3, make 2 of the cuts the same direction and one facing the opposite direction (flip the cookie cutter over). This way you will be able to hide the baked bottom sides on the inside of the cookie.
- For the middle cookie in each set (this will be 1 of the 2 you cut in the SAME direction in your sets of 3), use a small square/rectangular/oval cookie cutter (I just used a knife but that took more time) to cut a hole in the middle. You can also cut the ears and legs off of your middle cookies. Let the cookies cool on the baking sheet before moving them and removing the excess outer cookie.
- Before assembling, make your frosting "glue" by whisking 1/2 cup powdered sugar and 2 teaspoons of milk in a small bowl until smooth. Place in a small Ziploc bag with a small hole cut out of the corner for easier piping.
- To assemble, place 1 donkey cookie with the baked bottom side up. Outline the center of the piñata body with the frosting glue (no need to outline the ears, legs, or where the hole will be on the next cookie). Put the middle cookie on top of the frosting glue and and your mini M&M's in the hole. Outline the middle cookie with the frosting glue and then place the opposite-cut donkey cookie on top (so that the baked bottom side is facing in). Let them sit for at least 30 minutes before standing them upright.
No comments:
Post a Comment